Internal Mic - Cajon
16 posts
• Page 1 of 2 • 1, 2
![]() by +pablo+ » Sat Apr 01, 2006 4:04 am
by +pablo+ » Sat Apr 01, 2006 4:04 am
Internal Microphone
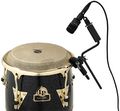
Per a previous thread on mics for congas, I was intrigued by Randall May internal mics: http://www.dwdrums.com/may/index.htm
http://www.randallmay.com/mike3.htm
With May being affiliated with DW drums, this is no junk or kludge. But they are $$$. I really liked the idea of being so clean: no stands or black wobbly things hanging in space. Arrive at the gig and plug in. Seriously, does LP think this is the answer?
Attachment: http://mycongaplace.com/forum/eng/uploa ... racket.jpg
+pablo+
- +pablo+
- Posts: 78
- Joined: Wed Dec 22, 2004 12:26 pm
- Location: DFW Texas
![]() by +pablo+ » Sat Apr 01, 2006 4:06 am
by +pablo+ » Sat Apr 01, 2006 4:06 am
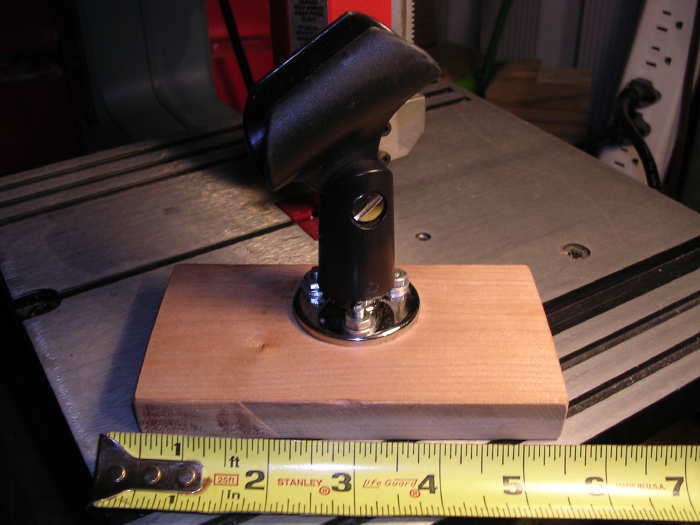
So for starts, before I attack my congas, I embarked on modifying my cajon….
Mic clip with three screw metal base mount from Radio Shack….dang did I really shop there..
Attachment: http://mycongaplace.com/forum/eng/uploa ... _stand.jpg
Mic clip with three screw metal base mount from Radio Shack….dang did I really shop there..
Attachment: http://mycongaplace.com/forum/eng/uploa ... _stand.jpg
+pablo+
- +pablo+
- Posts: 78
- Joined: Wed Dec 22, 2004 12:26 pm
- Location: DFW Texas
![]() by +pablo+ » Sat Apr 01, 2006 4:07 am
by +pablo+ » Sat Apr 01, 2006 4:07 am
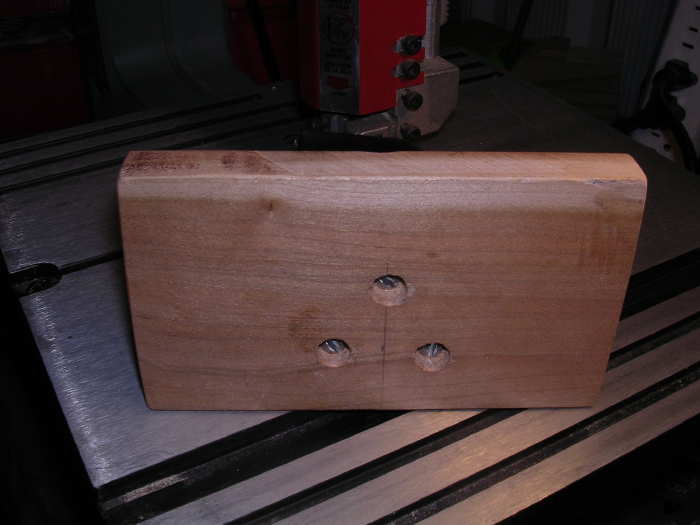
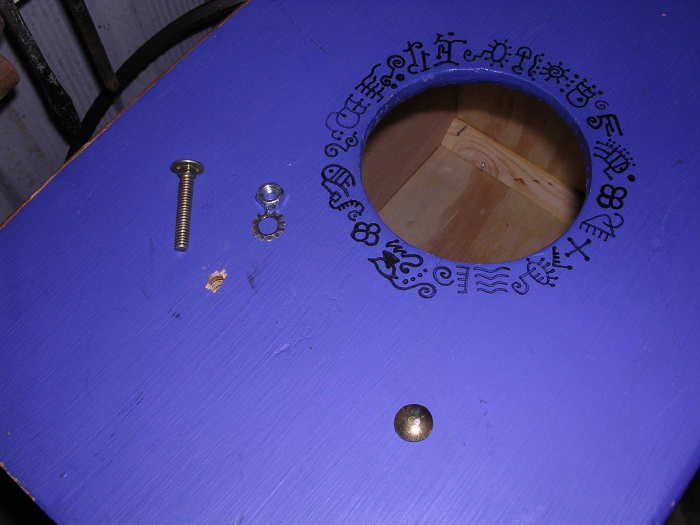
Mic clip back side. Screw holes couterbored to mount flush. Screw size #8’s. Nice semi hard wood piece approx 4 inches by 2 1/2 inches. Cajon hole is 4 inch diameter. Board length was originally 5”, but would not fit into hole with mount attached. Be sure to fit check up front.
Attachment: http://mycongaplace.com/forum/eng/uploa ... d_back.jpg
Attachment: http://mycongaplace.com/forum/eng/uploa ... d_back.jpg
+pablo+
- +pablo+
- Posts: 78
- Joined: Wed Dec 22, 2004 12:26 pm
- Location: DFW Texas
![]() by +pablo+ » Sat Apr 01, 2006 4:08 am
by +pablo+ » Sat Apr 01, 2006 4:08 am
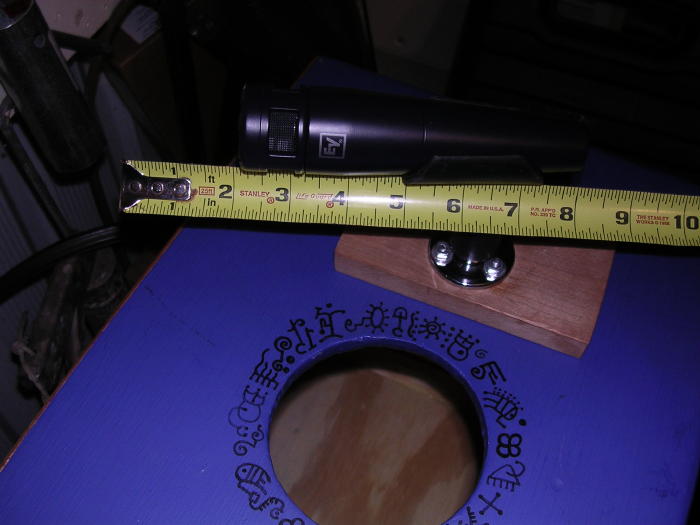
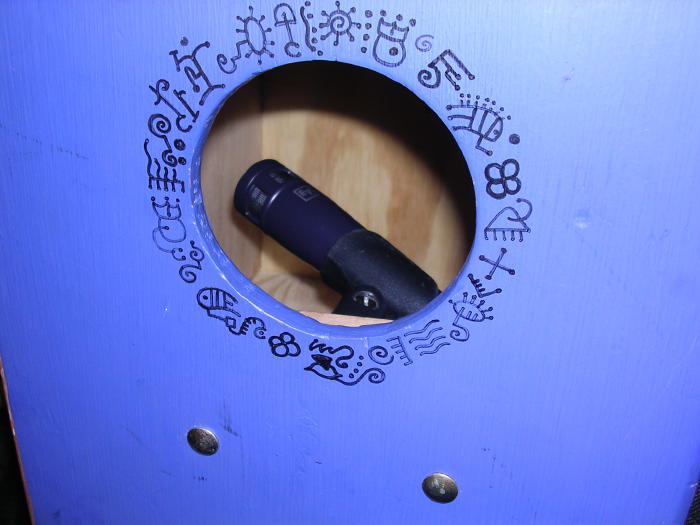
Trial positioning of EV Cobalt mic ~ 2 inches from face of cajon.
Attachment: http://mycongaplace.com/forum/eng/uploa ... sition.jpg
Attachment: http://mycongaplace.com/forum/eng/uploa ... sition.jpg
+pablo+
- +pablo+
- Posts: 78
- Joined: Wed Dec 22, 2004 12:26 pm
- Location: DFW Texas
![]() by +pablo+ » Sat Apr 01, 2006 4:09 am
by +pablo+ » Sat Apr 01, 2006 4:09 am
Drilling two carriage bolts (1/4”) to hold mic mount assembly.
Attachment: http://mycongaplace.com/forum/eng/uploa ... _bolts.jpg
Attachment: http://mycongaplace.com/forum/eng/uploa ... _bolts.jpg
+pablo+
- +pablo+
- Posts: 78
- Joined: Wed Dec 22, 2004 12:26 pm
- Location: DFW Texas
![]() by +pablo+ » Sat Apr 01, 2006 4:11 am
by +pablo+ » Sat Apr 01, 2006 4:11 am
Mic installed. Now at this point you could have the cable connected and hanging out the hole. But for a clean look, I chose to use a panel mount connector.
Attachment: http://mycongaplace.com/forum/eng/uploa ... talled.jpg
Attachment: http://mycongaplace.com/forum/eng/uploa ... talled.jpg
+pablo+
- +pablo+
- Posts: 78
- Joined: Wed Dec 22, 2004 12:26 pm
- Location: DFW Texas
![]() by +pablo+ » Sat Apr 01, 2006 4:12 am
by +pablo+ » Sat Apr 01, 2006 4:12 am
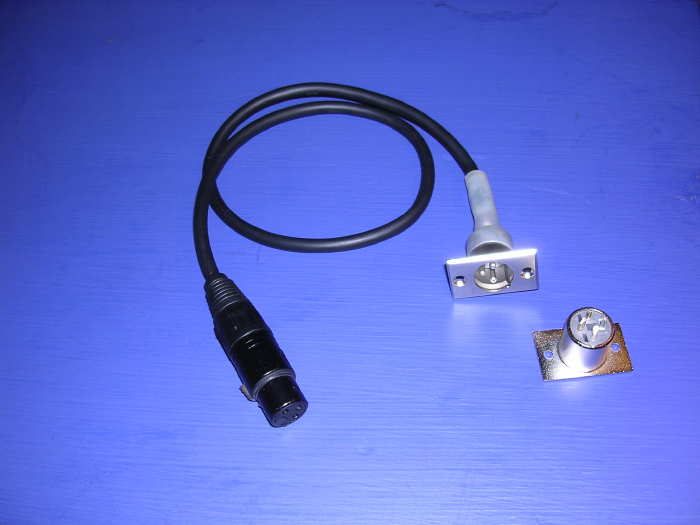
Finished XLR panel mount connector and shortened mic cable. Make sure XLR panel mount connector is male; most common is female. Found this one at Fry’s, $2.99
Also shown is the backside of an extra connector. To get here requires several steps and a little skill, namely re-soldering the wires. Original 20 foot cable was cut to a length of 2 feet. Note which wires are attached to which post ID. Use the cut male side as a guide; the XLR case unscrews to expose the three wire connections.
Use flux when soldering. Makes a world of difference. Be careful not to get the connector too hot, as the plastic could (and did) melt a little. Shrink wrap was also used on individual soldered wires and overall assembly. Shout out to Terry for helping me on this!
Attachment: http://mycongaplace.com/forum/eng/uploa ... _cable.jpg
+pablo+
- +pablo+
- Posts: 78
- Joined: Wed Dec 22, 2004 12:26 pm
- Location: DFW Texas
![]() by +pablo+ » Sat Apr 01, 2006 4:15 am
by +pablo+ » Sat Apr 01, 2006 4:15 am
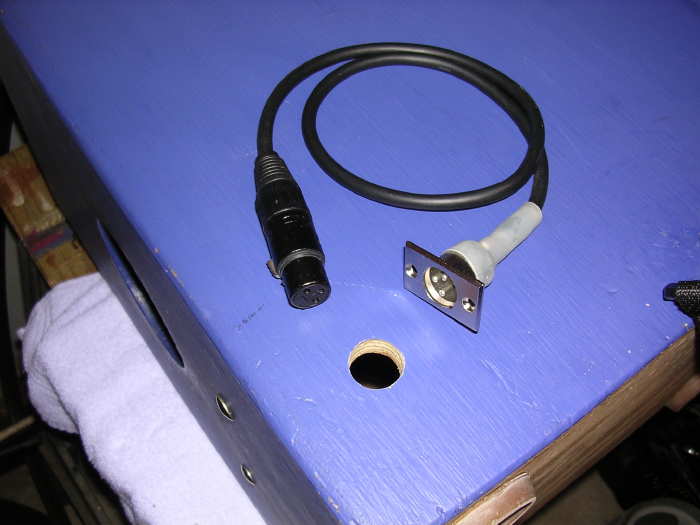
Drilling 3/4 diameter hole for connector. Put some masking tape on back side to prevent splintering
upon drill breakout. I used that block of wood to press on backside right before breakout.
The thought of doing this to my congas...SCARY!!!
Attachment: http://mycongaplace.com/forum/eng/uploa ... lling1.jpg
upon drill breakout. I used that block of wood to press on backside right before breakout.
The thought of doing this to my congas...SCARY!!!
Attachment: http://mycongaplace.com/forum/eng/uploa ... lling1.jpg
+pablo+
- +pablo+
- Posts: 78
- Joined: Wed Dec 22, 2004 12:26 pm
- Location: DFW Texas
![]() by +pablo+ » Sat Apr 01, 2006 4:15 am
by +pablo+ » Sat Apr 01, 2006 4:15 am
Finished hole. Mounted connector with two small countersunk screws.
Attachment: http://mycongaplace.com/forum/eng/uploa ... finish.jpg
Attachment: http://mycongaplace.com/forum/eng/uploa ... finish.jpg
+pablo+
- +pablo+
- Posts: 78
- Joined: Wed Dec 22, 2004 12:26 pm
- Location: DFW Texas
![]() by +pablo+ » Sat Apr 01, 2006 4:22 am
by +pablo+ » Sat Apr 01, 2006 4:22 am
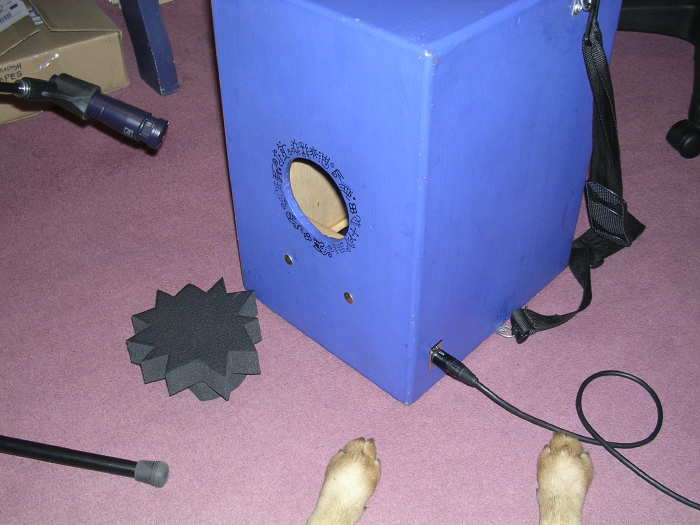
Sound check/Dog paws/comparing internal mic to an external one. Internal sounds really good! Seriously. It boggles the mind that if you are standing inside the drum, it is nearly the same as standing outside. And one less mic stand to haul. (also shown is that foam sound hole muffle which now also serves as a ‘cover’ for my mic). Next project: internal mic for a Fat Conga Cajon…then the tumbas...
Attachment: http://mycongaplace.com/forum/eng/uploa ... finish.jpg
Attachment: http://mycongaplace.com/forum/eng/uploa ... finish.jpg
+pablo+
- +pablo+
- Posts: 78
- Joined: Wed Dec 22, 2004 12:26 pm
- Location: DFW Texas
![]() by +pablo+ » Sat Apr 08, 2006 3:29 am
by +pablo+ » Sat Apr 08, 2006 3:29 am
Diceman, sorry so long to reply. I mounted an EV Cobalt mic that is essentially an equivalent to a Shure SM57. One complaint is that they require a little more gain; thus the problem. Most sound guys are reluctant to set the mic higher. The end result then is not being heard. Now, with this mic inside the cajon, it requires less gain!
About positioning: see ‘Mic installed pic. The very end of the mic is set ~2 inches from the ‘drum head.’ The piece of wood is set just below the sound hole. This places the mic just below the middle of the head and slightly off center. I thought about setting it above the sound hole, to get it closer to the edge (where your fingers hit), but I experimented first. Using a boom stand, place the mic inside, high or low…play around with positioning till you get a sound you like. Use a stand. If you use your hand to hold the mic inside, it blocks too much of the sound hole and you can’t get a good indication of the timbre.
I used a block of wood so if I needed to adjust the mic position, I could just re-drill the holes, slot them, or get a new board, all the while just having two holes in the drum itself. Did that make sense?
For my congas I am going to experiment with a ‘mic on a stick’ so I can place the drum over them. That way I can play around with distance away from the head as well as radial location. Then once I find the ‘perfect’ location, I work on designing a bracket, etc…
+pablo+
- +pablo+
- Posts: 78
- Joined: Wed Dec 22, 2004 12:26 pm
- Location: DFW Texas
![]() by Diceman » Sat Apr 08, 2006 9:01 am
by Diceman » Sat Apr 08, 2006 9:01 am
Thanks for info Pablo.
I used my cajon on a gig last weekend, and the sound guy had all sorts of problems, loads of bass but no real 'snare' sound, so I am keen to get going on this.
I'll let you know how I get on
Suave
Diceman
I used my cajon on a gig last weekend, and the sound guy had all sorts of problems, loads of bass but no real 'snare' sound, so I am keen to get going on this.
I'll let you know how I get on
Suave
Diceman
-

Diceman - Posts: 495
- Joined: Fri May 06, 2005 9:28 am
- Location: London England
![]() by Diceman » Sat May 06, 2006 7:14 pm
by Diceman » Sat May 06, 2006 7:14 pm
Pablo,
I tried what you suggested and wahaaaay, heavy metal!!
It sound great, I got the mic fixed between the middle of the hole and the top so I can swing it high or low. High gives more emphasis to the 'open' tones and low to the 'bass' tone.
So I can tune it depending on the gig.
I am using it tomorrow with a French songwriter, who does kind of rap/rock so I'll set it to the high 'snare sound.
Thanks for info, it work great.
Suave
Diceman
-
Diceman - Posts: 495
- Joined: Fri May 06, 2005 9:28 am
- Location: London England
16 posts
• Page 1 of 2 • 1, 2
Who is online
Users browsing this forum: No registered users and 19 guests